Restore and Revitalize: A Guide to Leather Care with Geist.

Leather, a material as old as mankind, continues to be a symbol of luxury, durability, and timeless elegance. From high-end car interiors and exquisite furniture to cherished handbags and shoes, leather is ubiquitous in our lives. Despite its inherent resilience, leather is not immune to the rigors of time and use. Scuffs, cracks, stains, and general wear are common issues that can diminish its beauty. Thankfully, with the right knowledge and products, these damages can often be repaired and the material restored to its former glory. This guide, inspired by the Geist. Training Manual, delves into the art and science of leather care, repair, and restoration, emphasizing effective techniques and innovative products.


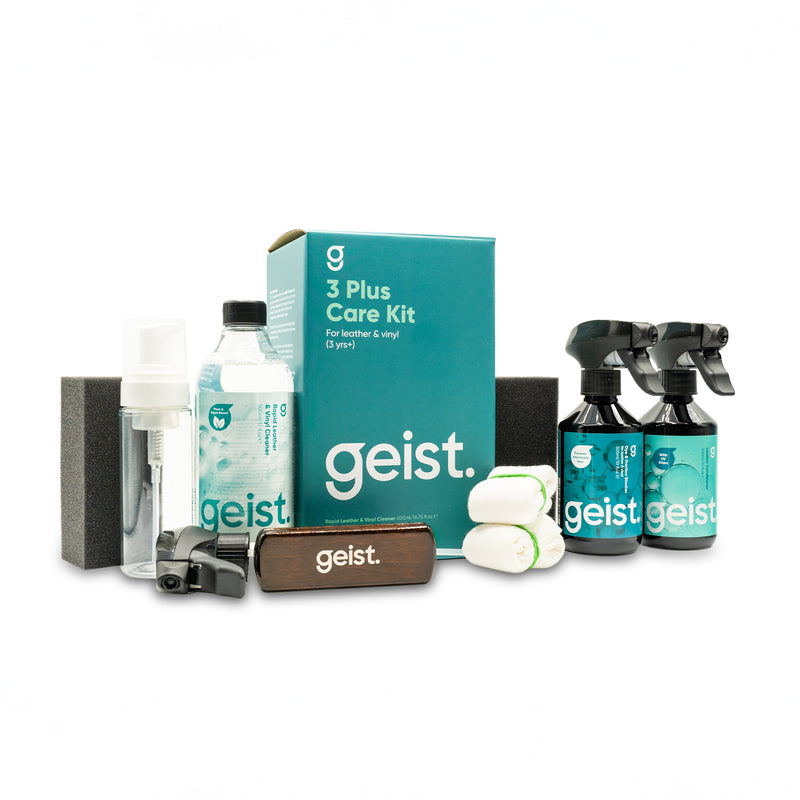
The Spirit of Leathercare: About Geist.


Geist. is a brand born from a conviction that the future of leather care lies in environmental and performance innovations. Developed by German chemists with over 40 years of experience and registered patents in the leather and automotive industries, Geist. products prioritize efficiency, safety for surfaces and consumers, and environmental responsibility. Their commitment has led to their products being used by leading suppliers to major automotive manufacturers like Tesla, BMW, JLR, Mercedes, and VW Group, as well as significant furniture manufacturers worldwide. Geist., which literally translates to "Ghost" but also means "Spirit," embodies the "Spirit of Leathercare".


Understanding Leather and Its Vulnerabilities


Leather is essentially tanned animal skin, primarily composed of collagen fibers. Tanning is a chemical process that transforms perishable animal skins into a stable, non-decaying material. A remarkable property of leather is its breathability and ability to absorb up to 30% water without feeling wet, a characteristic not easily replicated by other materials.

However, this luxurious material faces several common adversaries:

  • UV & Heat: Exposure to high temperatures can cause irreversible shrinking in leather. UV radiation can lead to fading, particularly in lightly pigmented or undyed leathers like aniline and suede.

  • Sweat, Dirt, and Improper Cleaning: Over time, bacteria, skin oils, and moisture can oxidize and degrade the leather's tanning agents. Using alkaline cleaning products (like common soaps with a pH of 10) on leather, which has a natural pH of 3 to 3.5, can weaken its bonds and cause degradation.
  • Friction & Abrasion: Constant rubbing, such as getting in and out of a car seat, can erode the topcoat and underlying protective color layer. This is frequently seen on car seat bolsters and worsens if left untreated.

  • Accidents & Ageing: Spills, scratches, and burns cause localized damage, while general wear over time can lead to dry, hard leather and cracks. Depending on the severity, even aged leather can often be restored to a "like new" appearance.

The Restoration Journey: A Step-by-Step Approach


Geist. outlines a comprehensive process for successful leather repair and restoration:

  1. Cleaning and Removing Dirt: Thorough cleaning is paramount for product adhesion. For light dirt, use Rapid Cleaner (Plant-based). For heavy soiling or full interior restoration, our Rapid Leather & Vinyl Cleaner Pro with a Leather Cleaning Brush is recommended.

  2. Degreasing: Grease, whether from conditioning products or body contact, can hinder adhesion. Use Degreaser D1 for surface-level grease. For deeper degreasing and evening out topcoat levels, Degreaser PRO D3 is effective.
  3. Carry Out Repair Work: This step involves colour matching and applying the appropriate filler. Geist. offers two main types of fillers:

    • Leather Filler Pro for wear damage like cracks, especially where grain imprinting isn't necessary.

    • Leather & Vinyl Paste for spot repairs, key scratches, scuffs, and holes where grain imprinting is required.

    • After filling, Primer is crucial for promoting paint adhesion. Apply paint in thin layers, drying each with a heat gun.

  4. Spray Topcoat: The topcoat provides the desired finish and protection. Mix Top Coats Matt and Gloss to achieve the desired sheen (a 70% Matt, 30% Gloss mix provides a satin finish for automotive interiors). Crucially, add Crosslinker to the topcoat mixture to enhance water, sweat, and rub resistance. Apply two even layers, drying with a heat gun. A final layer of Dye & Friction Blocker significantly increases durability.

The Art of Colour Mixing and Changing


Achieving an accurate color match is vital for a seamless repair. Geist. provides 22 base colors and emphasizes the importance of mastering the color wheel for precise mixing. Testing and drying small batches are key to success.

For refreshing existing colors, Geist. Easy Colour Restorer (Neutral) can be mixed 50/50 with leather paint, creating a one-step recoloring product. While changing the color of leather furniture or car seats is possible, it comes with its own set of considerations, including potential difficulties in achieving perfect coverage in all areas and the long-term durability of the new paint layer.

By understanding the nature of leather, the causes of its damage, and following these expert-backed restoration processes with quality products, you can breathe new life into your cherished leather items.

Read more →

Mastering Leather Repair: Fun, Facts & Fixes with Geist

Let’s face it—leather is classy, comfy, and seriously cool. But even the finest leather can crack, fade, or dry out over time. The good news? With a little knowledge, the right products, and some elbow grease, you can bring it back to life. Welcome to the world of leather restoration, where tradition meets science—and Geist makes it easy, eco-friendly, and even fun.


🐄 What Is Leather, Anyway?

Leather is a natural wonder—crafted from animal hide and transformed through tanning. Its unique texture, strength, and beauty have made it a favorite for car interiors, furniture, fashion, and more. The process includes:

  • Preparation & Tanning – Salted hides are treated using chrome (fast & modern) or vegetable (slow & natural) tanning.

  • Fatliquoring & Dyeing – Oils and dyes are added to create softness and depth of color.

  • Finishing – A protective top coat is applied. Think of it like skincare for your car seats.

👉 Did you know? One gram of leather can contain over 300 square meters of inner surface! That’s why it breathes, absorbs, and lasts like no synthetic ever could.


🧪 How Leather Is Made

The leather production process begins with raw animal hides, usually cowhide. Once cleaned, they're soaked, limed, and dehaired. Next comes tanning—the step that turns perishable skin into durable leather. There are two primary methods:

  • Chrome Tanning: This fast and widely used method creates soft, blueish Wet Blue leather that’s easy to dye and versatile in application.

  • Vegetable Tanning: A slower, more traditional method using natural tannins from plants, producing firmer leather often used in belts and saddles.

Some leathers are tanned using a mix of both or through rarer methods like oil, aldehyde, or alum tanning. Each method produces a unique result in color, texture, and durability.

Leather is then dyed, fatliquored (conditioned with oils), and finished with a protective coat. At the end of the process, you get a material that’s breathable, comfortable, and remarkably long-lasting.


💥 Common Leather Problems (and How to Spot Them)

Even tough materials need TLC. Here’s what can go wrong:

  • Dryness & Cracks – Caused by age, heat, or skipped care routines.

  • Shine & Grease – Often from headrests, armrests, or steering wheels.

  • Color Transfer – Especially with poorly dyed or worn leather.

  • UV Damage – Fading and drying from sunlight.

  • Stains & Scuffs – Everyday life takes a toll.


🧼 Step 1: Start with a Clean Slate

Cleaning is essential for effective repairs. Our Rapid Cleaner PRO with a Leather Cleaning Brush tackles deep dirt and oils.

🧴 For gentler cleaning or spot jobs, use the Rapid Cleaner (Plant-Based)—eco-friendly and safe for delicate surfaces.


🌱 Step 2: Degrease Naturally

Grease can prevent repairs from bonding. Use Degreaser D1—a plant-based solution—to prepare the surface. For heavy-duty jobs, Degreaser Spirit D2 or Dissolve PRO works wonders.


🧽 Step 3: Smooth It Out

Using a Sanding Pad, gently smooth out cracks and glossy areas. This opens the surface and ensures better adhesion of filler or paint.


🛠️ Step 4: Fill Those Flaws

For cracks, scratches, or small holes, use Leather Filler Pro. Spread it with a spatula, let it dry, and repeat as needed. For deeper damage, use Leather & Vinyl Paste and finish with the Dissolve Pen to blend seamlessly.


🔄 Step 5: Replicate the Grain (Optional)

Need to restore the leather’s texture? Our Grain Replicator Kit lets you emboss texture back into the surface for a flawless finish—even after painting.


🎨 Step 6: Add Some Colour

Our Leather & Vinyl Paint system includes 22 base tones to mix your perfect match. Use a sponge or spray gun for application, drying each thin layer with a heat gun.

🎯 Want a factory-perfect finish? Just send us your car’s registration number, VIN, or a leather sample—we'll mix a custom colour just for you.


🛡️ Step 7: Seal the Deal

Apply Top Coat to protect your paint. Add Crosslinker for extra durability—great for high-wear areas. Choose matte, gloss, or satin for the perfect finish.

Finish with Dye & Friction Blocker for smoothness and extra protection.


💡 Bonus Options

  • Fast Fix: Use Easy Colour Restorer for quick touch-ups. It includes primer and top coat in one and can be applied by sponge.

  • Shiny Steering Wheel? Degrease and apply Dye & Friction Blocker to bring back the matte finish.

  • Plastic Parts? Our paint works there too—just add Crosslinker.

  • Ink Problems? Use Ink & Dye Remover or seal with Repair Blocker before repainting.


📈 The Growing Market for Leather Repair

With more people choosing quality over quantity, restoring leather is smarter than replacing it. From classic cars to modern sofas, more customers are seeking eco-friendly, cost-effective restoration.

Geist is trusted by top automotive brands (Tesla, BMW, Mercedes, VW) and global furniture companies. Our products are Designed in Germany, Made in Poland, and engineered for professionals and passionate DIYers alike.

Whether you're a furniture shop, auto detailer, or bag repair studio, we offer tailored solutions—from simple cleaning product sales to full-service repair training.


🗣️ Communicating with Your Clients

  • Be Honest: Explain potential outcomes clearly—like how colour changes can affect texture.

  • Set Expectations: Let customers know that repairs, while durable, can’t always match the longevity of factory finishes in high-wear areas.

  • Teach Aftercare: Offer guidance on cleaning, conditioning, and maintaining leather for best results.


✨ Final Thoughts

Repairing leather doesn’t have to be intimidating—it can be fun, rewarding, and sustainable. With Geist, you get professional-grade products, planet-friendly formulas, and expert support.

So, whether you’re breathing new life into your car’s interior, your favorite sofa, or a beloved handbag, Geist is your go-to for performance and peace of mind.

👉 Start your leather restoration journey at leathercare.com today!


Read more →

Fatty spew on leather

If you’re seeing a whitish or brownish coating on your leather and thinking, “Uh-oh, is that mold?”, take a breath! What you’re likely looking at is fatty spew – also known as spew or fat bloom. This is a natural occurrence where fatliquors used during the tanning process from within the leather migrate up to the surface, solidify upon contact with air, and create a waxy coating. And while it might look concerning, it’s easy to handle with the right steps!

What Causes Fatty Spew?

Fatty spew can arise from fats in the leather or oils used during tanning and rehydration. This sneaky wax can show up weeks after production and often occurs when items are packed in plastic in humid areas, “sweating” out these oils on long trips.

Quick Check Tip: Unsure if it’s fatty spew or mold? Just run a hair dryer over the area. If it melts and vanishes, it’s fatty spew. Mold, however, stays put.

How to Handle Light Fatty Spew

For light cases, take a hair dryer, apply gentle heat, and watch the fatty spew disappear as it melts. If it reappears, just repeat the process for a quick refresh.

Dealing with Moderate Fatty Spew on Water-Resistant Leather

For more noticeable spew that’s not easily handled by quick warming, here’s your go-to method:

  1. Clean: Start with Geist Rapid Leather & Vinyl Cleaner. Spray a bit on a cloth, wipe down the surface, and let the cleaner get rid of any dirt and oils on top.

  2. Degrease: Follow up with Geist Degreaser D1. This tackles the deep-set fats that make their way to the surface as fatty spew. Let it air dry, or use a hair dryer to speed things up.

  3. Protect: Seal it all in with Geist Leather Preserver. While this won’t eliminate fatty spew forever, it gives the surface a protective shield and slows down future spew.

This quick routine is way more efficient than the constant blow-drying and wiping game – though keep in mind, humidity and temperature changes can encourage fatty spew to reappear over time.

When to Bring in the Pros

If the fatty spew keeps coming back, especially on porous or sensitive leathers, consider professional cleaning for a full solvent-based degreasing. And if you’re working with lots of leather goods (like bulk shipments), a professional approach can save you a lot of time and ensure your pieces stay spew-free.

The Science Behind Testing for Fatty Spew

Leather expert Gerber Andreas Ollert created a test for fatty spew:

  1. Pour 50-100 ml of water into a 500 ml lab beaker.
  2. Secure a piece of leather over the beaker’s opening, with the grain side up, using a rubber band.
  3. Heat the water for 2+ minutes to let steam rise through the leather.
  4. Remove the leather, dry the beaker, then re-wrap the leather airtight for 3-5 days at room temperature. No spew by the end? No long-term issue expected!

Read more →

Has Your Leather Sofa Become Your Cat’s New Plaything? No Problem – Let’s Fix It!

If your leather sofa has fallen victim to some “creative” scratching from your feline friend, don’t fret! With just a few easy steps and the right products, we can turn those claw marks into a distant memory.

Step 1: Get to Know Your Leather

Before diving in, let’s make sure we’re working with the right game plan. Here’s a quick test:

  • Pigmented Leather: Drip a bit of water on a hidden part. If it beads up on the surface, you’re working with pigmented leather (yay, a bit easier to manage!).
  • Porous Leather: If the water soaks in and darkens, it’s porous leather – approach with care.

Still not sure? Send us a quick photo, and we’ll help pinpoint the leather type and recommend the best products!

Fixing Superficial Scratches – Get Ready to Transform!

Scratches tend to pop out, don’t they? Lighter on dark leather, darker on light leather... But don’t worry, Geist Easy Colour Restorer is here to save the day!

  1. Degrease It: Start by giving the scratched area a quick clean with Geist Degreaser D1 – just a dab will do.
  2. Smooth It Out: Use the Geist Leather Sanding Pad to gently sand down any roughness for a smooth finish.
  3. Color Magic: Sponge on Geist Easy Colour Restorer to blend the color in seamlessly. Got a unique shade? Send us a sample, and we’ll whip up a custom color match for you!
  4. Set It to Dry: Grab a hairdryer and dry each layer in between for a smooth, polished look.

For tiny areas, dab on the color with a thin brush – Geist Easy Colour Restorer binds beautifully, making scratches disappear like magic.

Tackling Deeper Scratches – No Challenge Too Big

When those scratches are a bit rougher:

  1. Glue It Like a Pro: With a steady hand, apply a thin line of Geist Leather Glue using a needle and gently press the fibers down.
  2. Clean-Up Duty: Wipe away any extra glue with Geist Degreaser D1 to keep things looking neat.
  3. Trim, If Needed: If some leather fibers are still sticking up, give them a little trim with nail clippers – it’s all about the smooth finish.

Repairing the Really Deep Scratches – Almost Like a Sofa Spa Day!

For those extra-intense scratches and tiny tears:

  1. Fill the Gaps: Apply Geist Easy Filler for Leather & Vinyl to fill any gaps and give the damaged area a firm base.
  2. Dye for the Win: Once the filler has dried, finish it up with Geist Easy Colour Restorer to match the surrounding color – good as new!

Pro Tip: Most cat scratches are surface level, so you may not need the filler unless your cat really got in the zone!

Final Finishing Touches

While these steps can make scratches much less noticeable, a tiny scar may remain. But hey, we like to think of it as part of your sofa’s character! For heavy-duty cat enthusiasts who’ve left no leather unturned, consider replacing the leather panel if needed.

With a bit of patience, some top-notch products, and a can-do attitude, you’ll have your sofa looking sleek and scratch-free again. Your leather is ready to face another season of kitty shenanigans!

Read more →

The Art of Reviving leather Dashboards

Leather dashboards are like the crown jewels of a luxury car interior – a bold, beautiful centerpiece that makes you feel like you’re driving in the lap of luxury. But when wear and tear strikes, the repair process can turn into a real art form. Done right, a repair blends seamlessly; done wrong, and it’s like a bad haircut you can’t unsee. Here’s the lowdown on restoring those leather beauties and keeping them looking pristine.

Picking the Perfect Leather

Choosing leather for a dashboard isn’t just about picking something that looks good; it has to perform well too. Dark colors are your best friends here since they don’t create distracting glare on your windshield. So, if you’re eyeing a lighter shade, think twice – that fabulous cream color could end up making it harder to see the road! For the ultimate in low-glare class, we use a special matte finish that’s like a built-in shade filter. At Geist, we craft a custom leather top coat that keeps things luxe and low-key.

Tackling the Airbag Dilemma

Airbags add a unique twist to leather dashboards. You want a seamless, luxe look but with a quick breakaway for the airbag to deploy safely in a pinch. Leather thickness gets dialed down to a slim 0.45mm around airbag areas, ready to split open as needed – safety first, even in luxury!

Sticking with the Heat

Dashboards can reach desert-like temps, especially on a sunny day. To prevent any peeling or bubbling, a heat-resistant adhesive is essential. In some cases, the leather is even pre-shrunk to make sure it stays nice and snug once applied.

When Bubbles and Cracks Appear

Nothing spoils a sleek leather dashboard like an unsightly air bubble or a pesky crack. Air bubbles can sometimes be tackled with a bit of re-gluing, but don’t get too hopeful – dashboards can be picky about sticking down once they’ve lifted. Cracks, especially in warm climates, are another story; they’re best stabilized to prevent further spreading. Have a stubborn bubble or crack? Send us a photo, and we’ll help you decide if it can be salvaged or if it’s time to roll out the red carpet for a new piece.

With a bit of finesse, your leather dashboard can keep you riding in style, even after the years start to show. So, treat it right, drive happy, and keep your car looking like a million bucks!

Read more →

Embrace Autumn in Style with Suede & Nubuck Shoe Care Tips!

As the leaves turn and temperatures drop, it’s time to break out those cozy, stylish leather pieces: think soft nubuck boots, suede jackets, and sleek leather gloves. With their warm, velvety texture, suede and nubuck are perfect for fall – but they can be a bit high-maintenance in wet weather. Here’s how to protect your favorite cold-weather leather so it stays looking fabulous all season!

What Makes Suede & Nubuck So Special?

Suede and nubuck come from the soft side of the leather hide, giving them that unique, plush feel. Nubuck tends to be a bit finer, but both types bring an inviting warmth and sophistication. Unfortunately, they’re sensitive to water, grease, and fading – but no worries! With the right care, your leather goods will stay in top shape.

Protect First, Play Later!

Before stepping out in your new suede boots or nubuck jacket, give them some TLC with a few protective steps:

  • Geist Aniline Conditioner is your leather’s best friend! This spray keeps suede and nubuck supple, prevents drying, and helps preserve their color.
  • For a double layer of defense, follow up with Geist Fabric & Upholstery Protector. This powerful combo adds water resistance and helps keep stains at bay. Make a habit of treating your items within the first year and refreshing the protection regularly, based on how often you wear them.

The “Oops!” Kit for Suede & Nubuck Stains

Got a stain? No problem! Even if you missed the pre-treatment, there are ways to gently clean your favorite pieces:

  • Geist Suede & Nubuck Eraser – This magic eraser crumbles as it works, so it’s gentle while tackling dried stains.
  • Geist Leather Sanding Pad – For larger marks, this pad sands away dirt without harming the surface. Avoid liquid cleaners for small spots (they can cause the stain to spread!) and stick with these trusty tools.

For Stubborn Spots

If that stain’s still hanging on, Geist Degreaser D1 is your go-to. Just dab a small amount on a cloth and gently blot. For tricky fat or oil stains, a professional might be best, but Degreaser D1 often does the trick.

Washing & Waterproofing Suede and Nubuck

When your suede or nubuck pieces need a thorough clean, turn to Geist Rapid Leather & Vinyl Cleaner for a gentle, spa-like treatment. Just spritz it over the surface and let it work its magic—no scrubbing needed! This plant-based cleaner lifts dirt and grime, so after 5-10 minutes, you’ll only need a quick wipe with a damp cloth. Let it air dry in a cool spot, away from any sunlight or heaters, to keep that lush softness intact.

Once dry, finish with Geist Fabric & Upholstery Protector to shield your gear from water and stains, making it adventure-ready in any weather. Keep those suede and nubuck pieces looking flawless and fabulous, rain or shine!

Bring Back the Color

Is your suede looking a bit dull? Geist Easy Colour Restorer – Suede & Nubuck is a fantastic way to bring back the intensity of darker shades, especially for large pieces like furniture.

Keep It Classy All Season Long

With a bit of love and these easy care tips, your suede and nubuck will keep their rich, velvety look all season. While cleaning won’t make them brand-new, you can count on them staying stylishly polished. For super tough cases, a professional can always step in. Treat your leather with care, and it’ll reward you with years of fabulous wear!

Read more →

How to fix shiny leather on car seats

Leather can have either a glossy or matte finish, and which one is better depends on your personal preference and the intended use of the leather item. For example, modern leather car interiors typically feature a matte finish, while most leather shoes tend to have a glossy shine. However, daily wear and tear can cause matte leather to become shiny over time, especially in high-use areas like the driver's seat in cars.

The good news is that you can restore the original matte finish or even change a glossy leather item to a matte one, or vice versa. Here’s how to adjust the finish of leather and keep it looking its best.

How to Change Leather from Glossy to Matte or Matte to Glossy

Step 1: Clean the Leather Surface
To reduce the gloss on pigmented leather, start by cleaning the surface with Geist Rapid Leather & Vinyl Cleaner and a Geist Leather Cleaning Brush. This cleaning process will naturally reduce some of the shine. If the desired matte finish is achieved through cleaning alone, protect the leather with Geist Dye & Friction Blocker (3-6 months durability) or Geist Repel (12+ months durability) to maintain the finish and protect the leather from further wear and tear.

Step 2: Degrease the Leather
If cleaning doesn't remove enough gloss, the next step is to degrease the leather surface. Use Geist Degreaser D1 to completely dull the leather's surface. Degreasing will effectively remove oils and grease, which contribute to the leather's shine.

Step 3: Apply a Matte Finish
If additional dullness is required, or if you want to change the leather from glossy to matte, apply Geist Easy Colour Restorer Neutral Matt. This product allows you to adjust the level of gloss and can be applied using a sponge or a spray gun for a more even finish. Keep in mind, it’s easier to make leather glossy than to reduce shine. If you're working with large areas or want a perfectly uniform finish, we recommend seeking professional help, as a specialist can spray the product for a more even application.

Step 4: Protect the Leather Finish
To maintain a new matte finish, protect the leather with Geist Dye & Friction Blocker or Geist Repel. These products will help prevent further wear, shine, and damage to the surface of the leather.

The Science Behind Leather Gloss and Matte Finishes

If you look at leather under a microscope, you'll notice that the surface's texture plays a significant role in its gloss level. Matte leather has rougher, more defined edges that reflect less light, creating a dull finish. In contrast, smoother surfaces reflect more light, making the leather appear shinier. This explains why polishing or buffing leather increases its shine—by smoothing out the surface, you're reducing the shadows that would otherwise create a matte look.

By following these steps, you can easily restore or change the gloss level of your leather items, whether you prefer a shiny or matte finish.

Read more →

How to Remove Dye Stains from Leather Car Seats and Sofas

Dye transfer stains from clothing, especially denim, are a common issue on leather car seats and sofas. Lighter-colored leather shows these stains more visibly, and the longer the dye stays on the leather, the more difficult it is to remove. Here's how to effectively remove dye stains from leather, depending on the type of leather.

Best Way to Remove Dye Stains from Leather

If you have pigmented, monochrome, semi-gloss, or smooth leather, most dye stains can be removed with the right leather cleaning products. However, if the dye has penetrated the surface, you may need to use a dye restorer to repair the leather.

Follow these steps to remove dye stains:

  1. Start with Cleaning: Use Geist Rapid Leather & Vinyl Cleaner or Geist Rapid PRO Leather Cleaner for tougher stains. For best results, use a Geist Leather Cleaning Brush to work the cleaner deep into the leather grain. This step helps lift the dye from the surface without damaging the leather.

  2. Use Ink & Dye Remover for Stubborn Stains: If regular cleaning products don’t remove the stain, apply Geist Ink & Dye Remover. This plant-based formula is safe for leather, PU, and PVC surfaces. It removes dye transfer without damaging the top coating (clear coat) or altering the leather's finish.

    • Apply the remover and leave it to work for at least 30 minutes. For older or tougher stains, let it sit longer, or overnight if needed. Use a cotton bud to gently rub the stain and lift the dye. Avoid scrubbing too hard to prevent damage.
  3. Re-colour If Necessary: If the dye stain is still visible after cleaning, you may need to re-colour the affected area. Use Geist Easy Colour Restorer to match the original color. Contact us for a color match based on your sample.

  4. Protect the Leather: After cleaning, apply Geist Dye & Friction Blocker to protect the leather from future stains and discolouration. This product creates a protective barrier against abrasion, stains, and dye transfer. Use it every 3 to 6 months for maximum protection, especially on light-colored leather.

How to Remove Dye Stains from Faux Leather

The cleaning process for faux leather is the same as for real leather. If the dye transfer stains persist and cannot be removed, even recoloring may not completely fix the problem, as the dye may resurface.

Recommended Products for Removing Dye Stains on Leather:

By following these steps and using the recommended products, you can effectively remove dye stains from leather and faux leather, keeping your car seats and sofas looking pristine.

Read more →

Cleaning leather jackets and restoring the colour

How to Clean Leather Clothing

Leather clothing can get dirty, but unlike other garments, it’s important to use the right cleaners to avoid ruining the item. Without proper maintenance, leather can lose its quality and appearance.

Cleaning Leather Clothing

The Geist Rapid Leather & Vinyl Cleaner is an excellent maintenance cleaner for non absorbent leather garments. 

Many top grain leathers, such as motorcycle suits and jackets, have a pigmented protective coating that makes them waterproof and more resistant to fading and stains. These are easy to identify because moisture won’t penetrate or darken the leather. Minor scuffs and wear can be repaired with Geist Easy Colour Restorer. To prevent cracks and stains, apply Geist Leather Preserver twice a year.

Porous top grain leathers (aniline) are dyed through but have no coating, retaining their natural softness and flexibility. Moisture will penetrate and darken these types of leather. Aniline leather clothing should be treated with Geist Aniline Cream every 2-3 months to prevent water stains. Geist Aniline Conditioner revitalizes old aniline leather by adding softening oils, UV-filters, and intensifying dyes.

For suede and nubuck, light soiling can be removed with a Geist Leather Brush or Geist Nubuck Eraser. Treat suede and nubuck 1-2 times a year with Geist Aniline Conditioner, which protects against fading and dryness and helps restore colour after washing.

Repairing Leather Clothing

Scuffs or minor damage to smooth leather garments can be repaired using a Geist Leather Sanding Pad and Geist Easy Colour Restorer. Apply the product with a sponge on the damaged areas. For larger areas of fading or rips, consult a leather specialist.

Tears in suede or nubuck are often difficult to repair and may require replacement, depending on the extent of the damage.

Protecting Leather Clothing

The type of leather determines the best protection method. Smooth, pigmented leather should be treated 1-2 times a year with Geist Leather Preserver to keep it supple and protected from humidity.

Old and dry suede, nubuck, and aniline leather should be treated with Geist Aniline Conditioner 1-2 times a year to protect against aging and fading. Aniline leather should also be protected with Geist Fabric Protector.

These methods ensure that leather garments stay clean, protected, and last longer.


Read more →

Removing Ink, biro and pen marks from leather

Pen marks on leather can be frustrating, but it's essential to first identify the type of leather before attempting any cleaning, as incorrect methods can worsen the damage. Here are the various leather types and guidelines for removing pen marks:

  • Pigmented Leather: This type has a protective paint layer. Water won't penetrate the surface, and the leather usually has a grained, satin finish.
  • Aniline Leather: Porous and smooth, water will darken the leather as it absorbs.
  • Suede: The reverse side of smooth leather or split leather.
  • Nubuck: The sanded grain side of smooth leather with a velvety texture.
  • PU/Bycast/Bicast Leather: Split leather with a polyurethane film on the surface, often shiny and plastic-like.

Biro Marks on Leather

Pigmented Leather: Pen marks on pigmented leather are common but not always easy to remove, especially if older than three days. Older marks typically require re-colouring since ink penetrates the leather deeper over time. Be careful not to use the wrong product, which could worsen the issue.

For fresh marks, use Geist Ink & Dye Remover. Always test the product on a hidden area first. Apply the remover directly onto the pen marks or spread with a cloth, then leave it to lift the colour for at least 30 minutes, longer for older stains. Some heavy or older staining may need an overnight treatment. Many dyes visibly swim to the surface of the remover liquid, while others may need some rubbing with a cotton bud to lift them from the grain. The cotton bud will absorb the dye as it loosens it. Wipe off the remover with a dry, absorbent cloth and repeat the treatment if needed.

When the pen mark or dye is no longer visible, clean the surface with Geist Rapid Leather & Vinyl Cleaner or a moist cloth and leave it to dry.

Finally, protect the surface with Geist Dye & Friction Blocker or Geist Repel to prevent future discolourations and friction damage.

Aniline Leather: Due to its sensitivity and porous nature, removing pen marks from aniline leather should be done by a leather expert. Using Geist Ink & Dye Remover may cause more staining, and Geist Easy Colour Restorer is only suitable for one-tone leather. Consult a specialist for best results.

Suede or Nubuck: These materials are delicate, and removing pen marks is difficult. It's recommended to seek professional help. Testing in a hidden area and using a Geist Leather Sanding Pad can help, but be cautious. Colour repair is generally not possible.

PU or Bicast Leather: PU leather tends to be darker, making pen marks less noticeable. Always test in a hidden area first without too much pressure, as the surface can be easily damaged. Colour repairs are possible for monochrome leather.

Ink Stains on Leather

Pigmented Leather: The process for ink stains is the same as for biro marks. For smudges or spots, use Geist Ink & Dye Remover to dissolve the ink, followed by re-colouring with Geist Easy Colour Restorer. Protect the area with Geist Dye & Friction Blocker or Geist Repel

Aniline Leather: This type is highly sensitive due to its open pores. Ink removal should only be attempted by a professional.

Suede or Nubuck: Ink stains are difficult to remove from suede or nubuck. You can try using the Geist Leather Sanding Pad , but deeper stains often cannot be fixed. Professional help is advised.

PU or Bicast Leather: The same process as for pigmented leather applies.

Summary

Fresh ballpoint pen or biro marks on pigmented leather can be removed with Geist Ink & Dye Remover. For older or larger stains, Geist Ink & Dye Remover and possible re-colouring with Geist Easy Colour Restorer are required. Deep ink stains on smooth leather or marks on suede and nubuck are generally not removable without professional intervention.

Read more →